Newbie with timing issue

Disclaimer: Links on this page pointing to Amazon, eBay and other sites may include affiliate code. If you click them and make a purchase, we may earn a small commission.

Andersg

New member
Joined
Mar 31, 2024
Messages
3
Reaction score
0
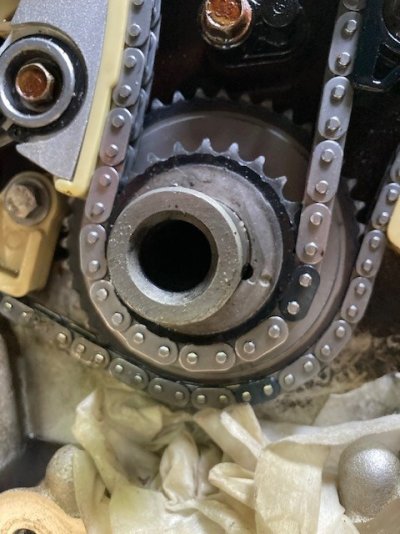
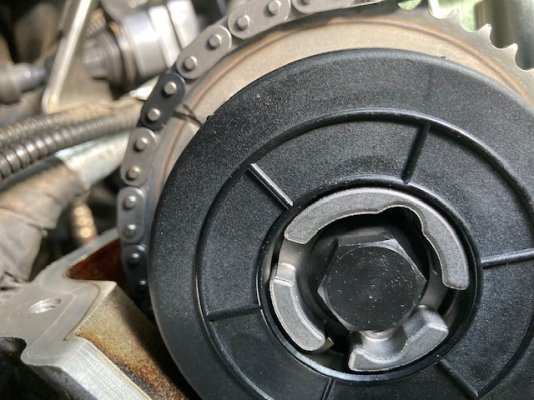
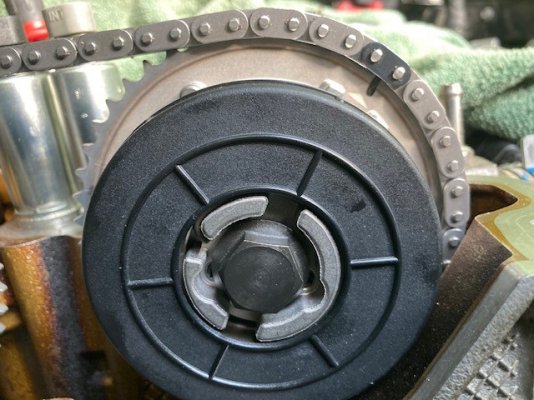
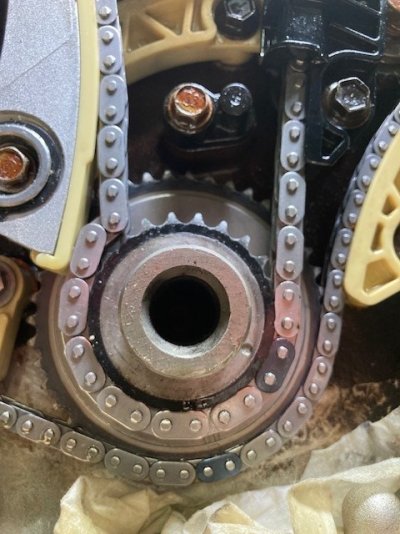
Need help. Was given a 2014 2.4L Equinox with a bad piston and rod bearing. Rebuilt engine with new pistons, rings, rods and crank with all new bearings. Valves and Cams were in excellent condition so did not replace. Engine assembled and installed. Starts right up and runs but, getting P0016 after it warms up. I have torn down the timing chain and cover and reset the chain and marked links according to specs, #1 cylinder TDC on exhaust at end of exhaust stroke, exh cam mark at 10, (notch on cam is at 7) intake cam mark at 2 (Notch on cam is at 11) with 14 links between the colored links, no slack from the intake to the crank gear with keyway at noon and timing mark at 4.5/5 on the dial. Colored link hits perfectly. Replaced the tensioner and made sure all chain slack was on the exh side of the crank timing gear so tensioner could take up all slack. Have done this 3x after getting codes and when i disassemble valve cover, chain has some slack although fully tensioned when assembled. Not much but enough play to cause concern considering how tight it is when timing is set (you need to maneuver the exhaust cam to get the notch to line up and variable timing gear to align perfectly, tension snaps chain back in place and taught. Tensioner and all other guides were replaced at time of rebuild. Replaced both cam and the crank sensor to be sure those were not an issue. Changed out the variable timing solenoids (exh and Intake) as well.

Definitely runs rough and in low power mode after warmed up so this does not appear to be a false code due to wiring or a short plus the slack does appear in the chain when removing valve cover. Where am i going wrong? I am really about $1500 into this so still inexpensive car but, would like to avoid 1K+ for a pro to redo the timing chain. I know the mechanical stuff pretty well, the electronics not so well. Need some experienced input here. Can't figure this one out even after reviewing other threads. Thank you in advance!
 

Andersg

New member
Joined
Mar 31, 2024
Messages
3
Reaction score
0
Hey Max. So a quick update. I changed out the cam gear phasers and it looks like the intake one was bad although it was new. Got rid of the codes however when i put it on the code reader, still have a P0011 code but pending so it is still a bit off. The plan is to borrow a more sophisticated reader from a friend and see if i cant get more details. Definitely runs better but not being street driven yet so not sure if the P0011 is a matter of the ECM resetting or not. Any thoughts on this would be appreciated. Thanks!
 

maxpg

New member
Joined
Apr 5, 2024
Messages
3
Reaction score
0
Thanks for sharing. I encountered a similar issue after replacing the timing chain, P0014 and P0341. I reopened it yesterday, verified the marks, all were correct. The cam phasers appear fine, moving with the shafts, but I decided to order new ones regardless. I also replaced both camshaft position sensors and the knock sensor. I plan to reassemble everything over the weekend and conduct tests. Looking forward to see you street test results too.
 

Andersg

New member
Joined
Mar 31, 2024
Messages
3
Reaction score
0
Here is the process that i photo documented for my own benefit. Note the crankshaft timing gear shows pre and post tensioner release with the slack showing to the exhaust side of the crankshaft on the before and the slack being taken up after. There are many videos out there but this one detail is not apparent in most and it is super critical. The other that shows on some is the need to put a wrench on the exhaust cam and rotate it slightly clockwise to get the cam shaft gear aligned to the pin position. Once you get that to pop on the end of the cam, you release the tension on the wrench and the chain is very tight from exhaust mark to the intake mark. All of that with number one at TDC on exhaust stroke so the intake lobes are really in contact with the intake valves on number one but not yet enough to open the valves as that happens immediately on the downstroke for intake of fuel/air as the engine rotates. This job can be done by removing the air filter housing etc on the top and the passenger tire and some of the wheel well trim however i found it much easier if i supported the engine with a jack and block of wood and removed passenger side motor mount assembly. The rear engine mount (drive axle passes through it) and the transmission do the majority of the work when supporting the engine but the jack allows you ability to align the access hole with the pulley tensioner and then everything else is more visible. Good luck! Will keep you posted on the road testing.
In the photos, note the rag stuffed into the small access to the oil pan below the crankshaft. Highly recommend this precaution or something will land in there and you are now dropping the oil pan too.
 

Attachments

  • Crank alignment after tensioner release.jpg
    Crank alignment after tensioner release.jpg
    87.9 KB · Views: 3
  • Exhaust cam mark alignment.jpg
    Exhaust cam mark alignment.jpg
    106.4 KB · Views: 3
  • Intake cam mark alignment.jpg
    Intake cam mark alignment.jpg
    104.3 KB · Views: 3
  • Timing chain alignment prior to tensioner release.jpg
    Timing chain alignment prior to tensioner release.jpg
    96.1 KB · Views: 3

Members online

Top