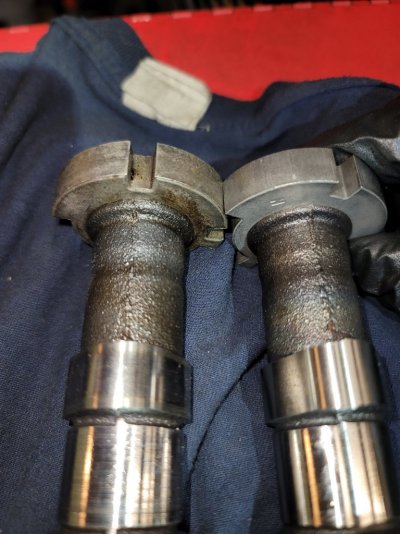
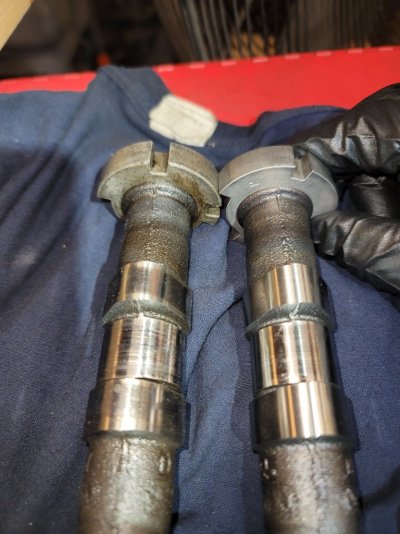
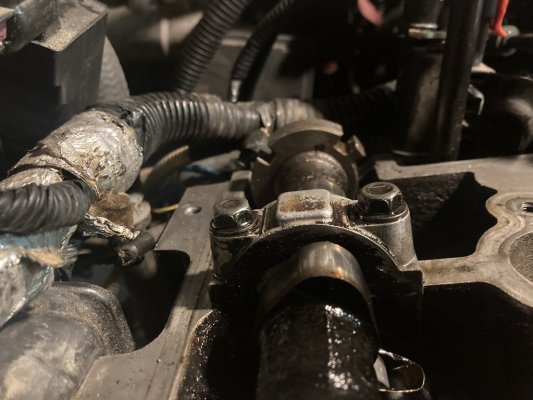
the cam on the right is correct the right photo is my engine do you see the lobe in front of the bearing how it is just a bit to the left of the cam reluctor? or the lobe is about 1 o'clock and the reluctor is about 2 o'clock
the cam on the left that reluctor is more aligned with the lobe and as the engine rotates it causes that reluctor to shift counter clockwise.
i tired to find mine but your reluctor has moved and for some reason the exhaust seems to be the ones that move. if your handy and want to repair this you can tap it back into the correct spot when the engine is set to TDC and then drill and insert tight roll pins. if you want to go that route let me know i have photos showing how and where to place them
this is the lea engine cam timing this is the lea engine cam position the real photo and the internet drawing.
View attachment 2035View attachment 2034
you do not need an special tools for holding the cams and the crank put the cam marks to this photo then install the phasers and the marks on the phasers will be like this photo. left is the exhaust right is the intake
View attachment 2036 View attachment 2037
this is the crank location with the gear on notice the left side chain is still lose because the tensioner has not yet been engaged
View attachment 2038
so put the chain on the crank aligning the mark them put the chain on the intake alligning the mark then hold the exhaust cam with a cresent wrench and you can them move the cam while you have the phaser mark on the chain and put it on the cam, no special tools needed. if you want a YT
check this one
if you need more let us all know and keep us updated. good luck remember after you install the chain to rotate the engine one time at least by hand use a hand wrench not an impact or the starter to make sure your not hitting the valves.